Geofence rules are one of the most powerful features of QuickCab. They allow for custom geofence areas to be drawn on a map and pricing rules to be defined for these areas. The areas can be as big or as small as you want and can take any shape. Some example use cases for this are:
I have advertised a specific journey to cost £20 between Westminster and Kensington and I want any of these journeys to always cost exactly this price
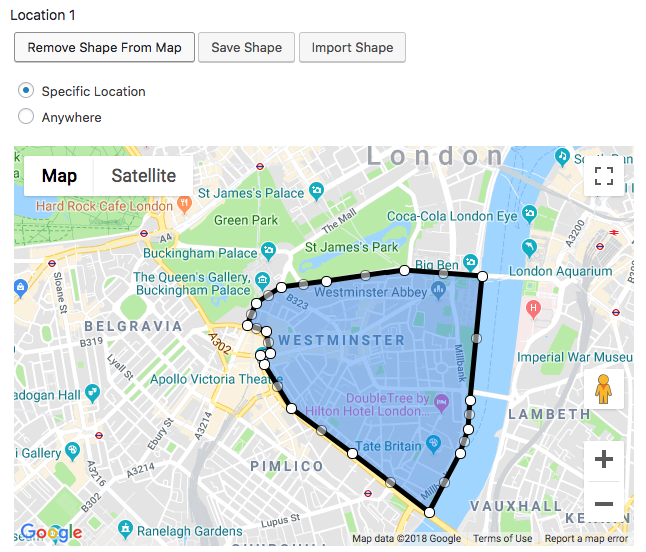
First, we will draw an area around Westminster. To do this, select the Specific Location radio button. Then, to draw on the map ensure the shape icon is clicked in the top toolbar in the map as shown in the image below. When selected, your cursor will be a plus icon when inside the map.
![]()
To draw the geofence area you must single-click on the map for every vertex of the polygon you want to draw. When you click a dot will appear on the map and your cursor will now be followed by a line. After you have made your shape you must click the first point again to complete the shape. The shape you have created will then be coloured in as shown in the image below.
If I wanted to save the shape I have just drawn to use in other Geofence rules I can do so by clicking the Save shape button (1) above the map as shown in the image below. I then type the name of the shape and click Save (2). The shape will then appear in the sidebar (3) and will be available to import in all Geofence rules.
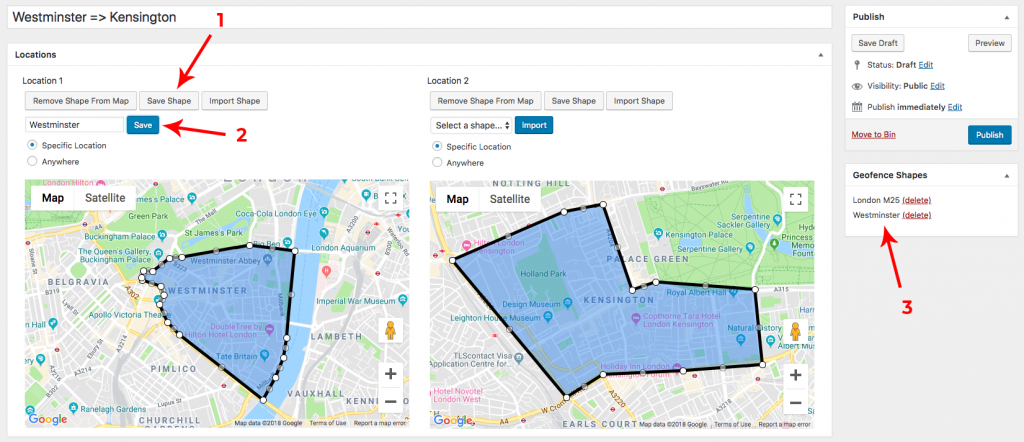
To import a shape simply click the Import shape button above the map and select from the drop-down menu. The shape will then be added to the map.
After adding the Kensington area to the map we are now ready to go to the Geofence options.
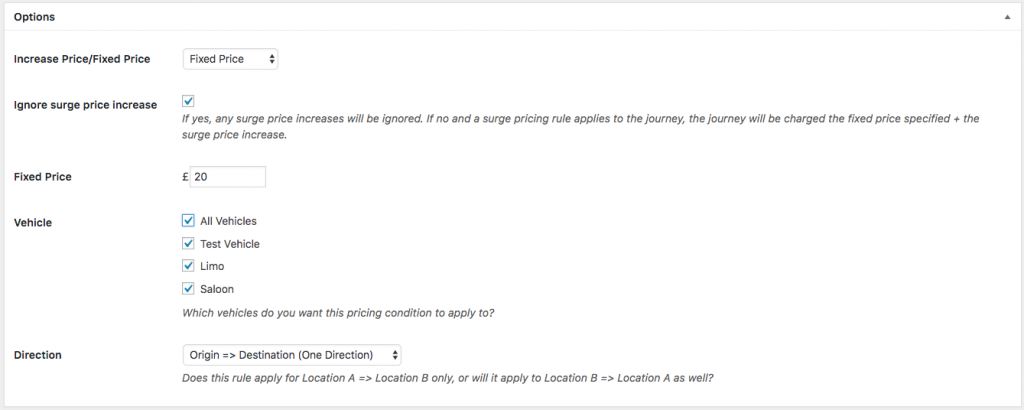
In the above options I have chosen a fixed price (£20) and I want to ignore any surge pricing rules. This means if this Geofence rule applied to a journey that someone booked someone booked then I would ignore all surge pricing rules. I have also selected this rule to apply to all vehicles, you can apply this to as many vehicles as you want. All your available vehicles will be displayed in this list. Finally, I selected the direction of this rule to be only Origin => Destination (i.e. Westminster => Kensington). If you wanted this rule to work in both directions (Westminster => Kensington & Kensington => Westminster) then you should select the other option.
Once I click save, all journeys which start in the first area and end in the second area in any vehicle will be charged exactly £20.